There are times when you have a WordPress site where you won’t need, want, or use comments. Opinions are good, but they can also be distracting.
Another reason would be that perhaps you don’t want to deal with all the spam that comes with moderating comments. There are a lot of instances where it’s best to disable WordPress comments altogether. In fact, we disable comments on this site.
Below are a few ways you can manage and disable comments in WordPress and our Perfmatters plugin.
- Disable WordPress comments globally
- Disable comments on a post or page
- Disable comments on multiple posts or pages
- Disable future comments
- Automatically close comments
- Re-enable comments
Disable WordPress comments globally
Follow the steps below to disable comments altogether on your WordPress site.
Step 1
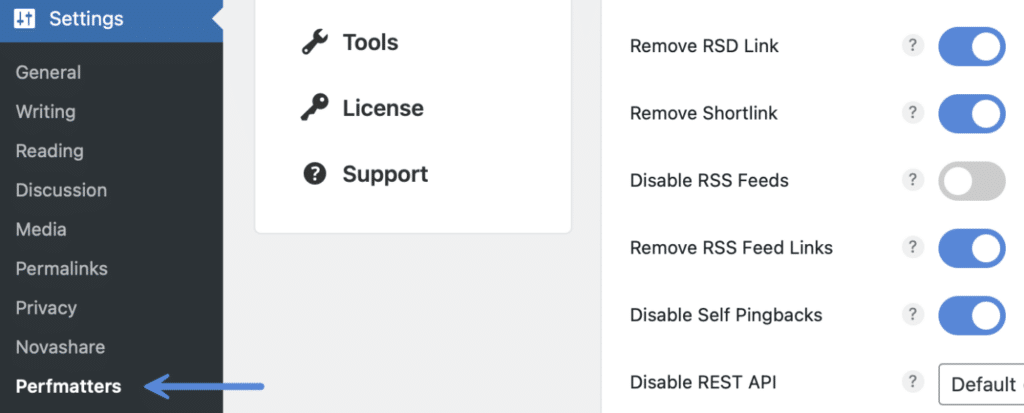
Click into the Perfmatters plugin settings.

Step 2
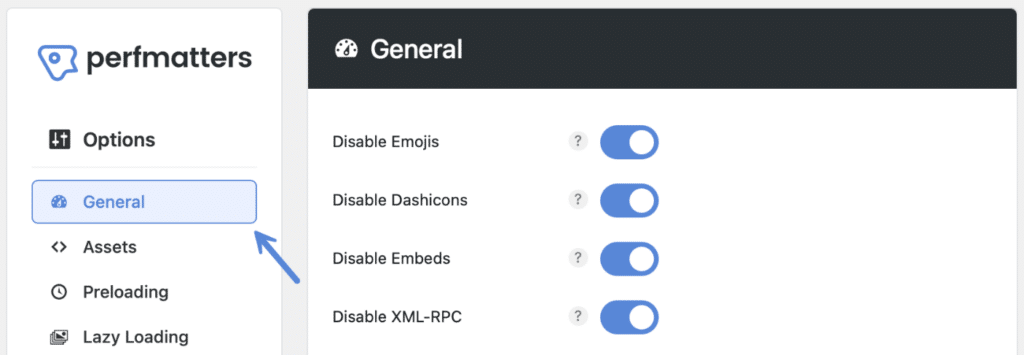
Make sure you’re on the “General” submenu.

Step 3
Scroll down and toggle on “Disable Comments.”

Step 4
Scroll down and click “Save Changes.”
Below is a list of the actions that we attempt to perform when Disable Comments is toggled on:
- Disable the built-in Recent Comments widget.
- Remove the X-Pingback header.
- Remove the comment feed links.
- Disable comment feed requests.
- Remove comment links from the admin bar.
- Remove support for comments from all post types.
- Close comment filters.
- Remove comment links from the admin menu.
- Disable built-in discussion page.
- Hide comments from the dashboard.
- Hide comment settings option from the profile page.
- Return a blank comments template when requested.
- Remove comment reply script.
The above feature will also hide the “Discussion” menu under “Settings.” It will not delete any existing comments; it will simply hide them. However, it does impact the individual discussion setting on posts/pages created after the feature is toggled on. If you need to re-enable comments, follow these steps.
Disable comments on a post or page
Note: The following will only work if you don’t have comments already disabled globally.
Comments can be disabled on any individual post or page. This is already an option in WordPress.
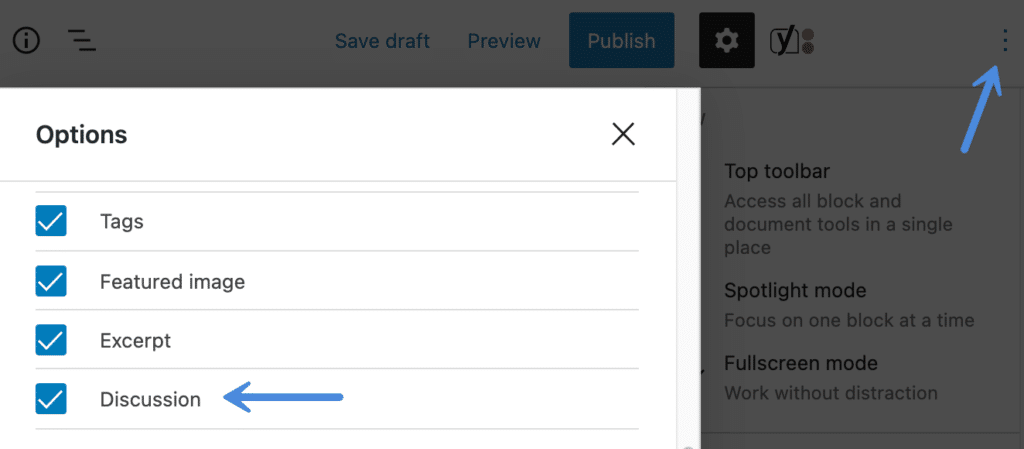
When editing a post or page in the Block Editor, click on the three dots at the top right. Then under “Options” make sure “Discussion” is checked (it might be already). In the Classic Editor, this is under “Screen Options.”

Once enabled, uncheck “Allow comments” on the sidebar. In the Classic Editor, this is below the main editor window.

Disable comments on multiple posts or pages
Note: The following won’t work if you already have comments disabled globally.
You can disable comments on multiple posts or pages in bulk. Follow the steps below.
- Click on Posts in the admin sidebar and under posts, select “All Posts.” For Pages, click on “Pages → All Pages.”
- Check the posts you would like to disable comments for.
- Select “Edit” from the “Bulk Actions” at the top of the screen and click the “Apply” button.
- Under “Comments,” select “Do not allow” and click the “Update” button.
Disable future comments
Note: The following won’t work if you already have comments disabled globally.
You can disable comments on all future posts. Go to “Settings → Discussion” and uncheck “Allow people to submit comments on new posts.”

Automatically close comments
Note: The following won’t work if you already have comments disabled globally.
You can close comments automatically after a certain number of days have passed. Go to “Settings → Discussion.” Under the “Other comment settings” check “Automatically close comments on posts older than xx days.” Select the number of days you desire.

Another alternative option would be to remove comment URLs, instead of disabling comments altogether.
Re-enable comments
To re-enable comments on your WordPress site in bulk, follow the steps below. Note: This will change the “updated date” if you utilize that.
- Make sure the “Disable Comments” feature in Perfmatters is toggled off.
- Click on Posts in the admin sidebar and under posts, select “All Posts.” For Pages, click on “Pages → All Pages.”
- Check the posts you would like to re-enable comments for. If you have a lot of WordPress posts or pages, you can click on the “Screen Option” tab at the top and increase the number of items per page. You can then select all of the posts on the same page at once.
- Select “Edit” from the “Bulk Actions” at the top of the screen and click the “Apply” button.
- Under “Comments,” select “Allow” and click the “Update” button.