There are times when you might want to migrate your WordPress site from www to non-www URLs. It could be that you just acquired a new site, or perhaps you are tired of the longer URLs. In any case, follow the quick tutorial below on how to migrate from www to non-www in a jiffy! It is a lot easier than people think. But you need to make sure it is done correctly.
www vs non-www
People have different opinions on what works the best, whether it is www or non-www. I am not going to go into that debate today. Other than some advanced DNS related things, there are really no benefits to having www anymore. I also haven’t really seen any difference with either, and I have worked in quite a few different niches. I personally prefer the shorter, non-www version.
How to Migrate From www to Non-www
When you migrate from www to non-www you will want to be careful when it comes to SEO. You need to have 301 redirects in place, otherwise, you could tank your rankings! But don’t worry, I will cover this below.
Step 1
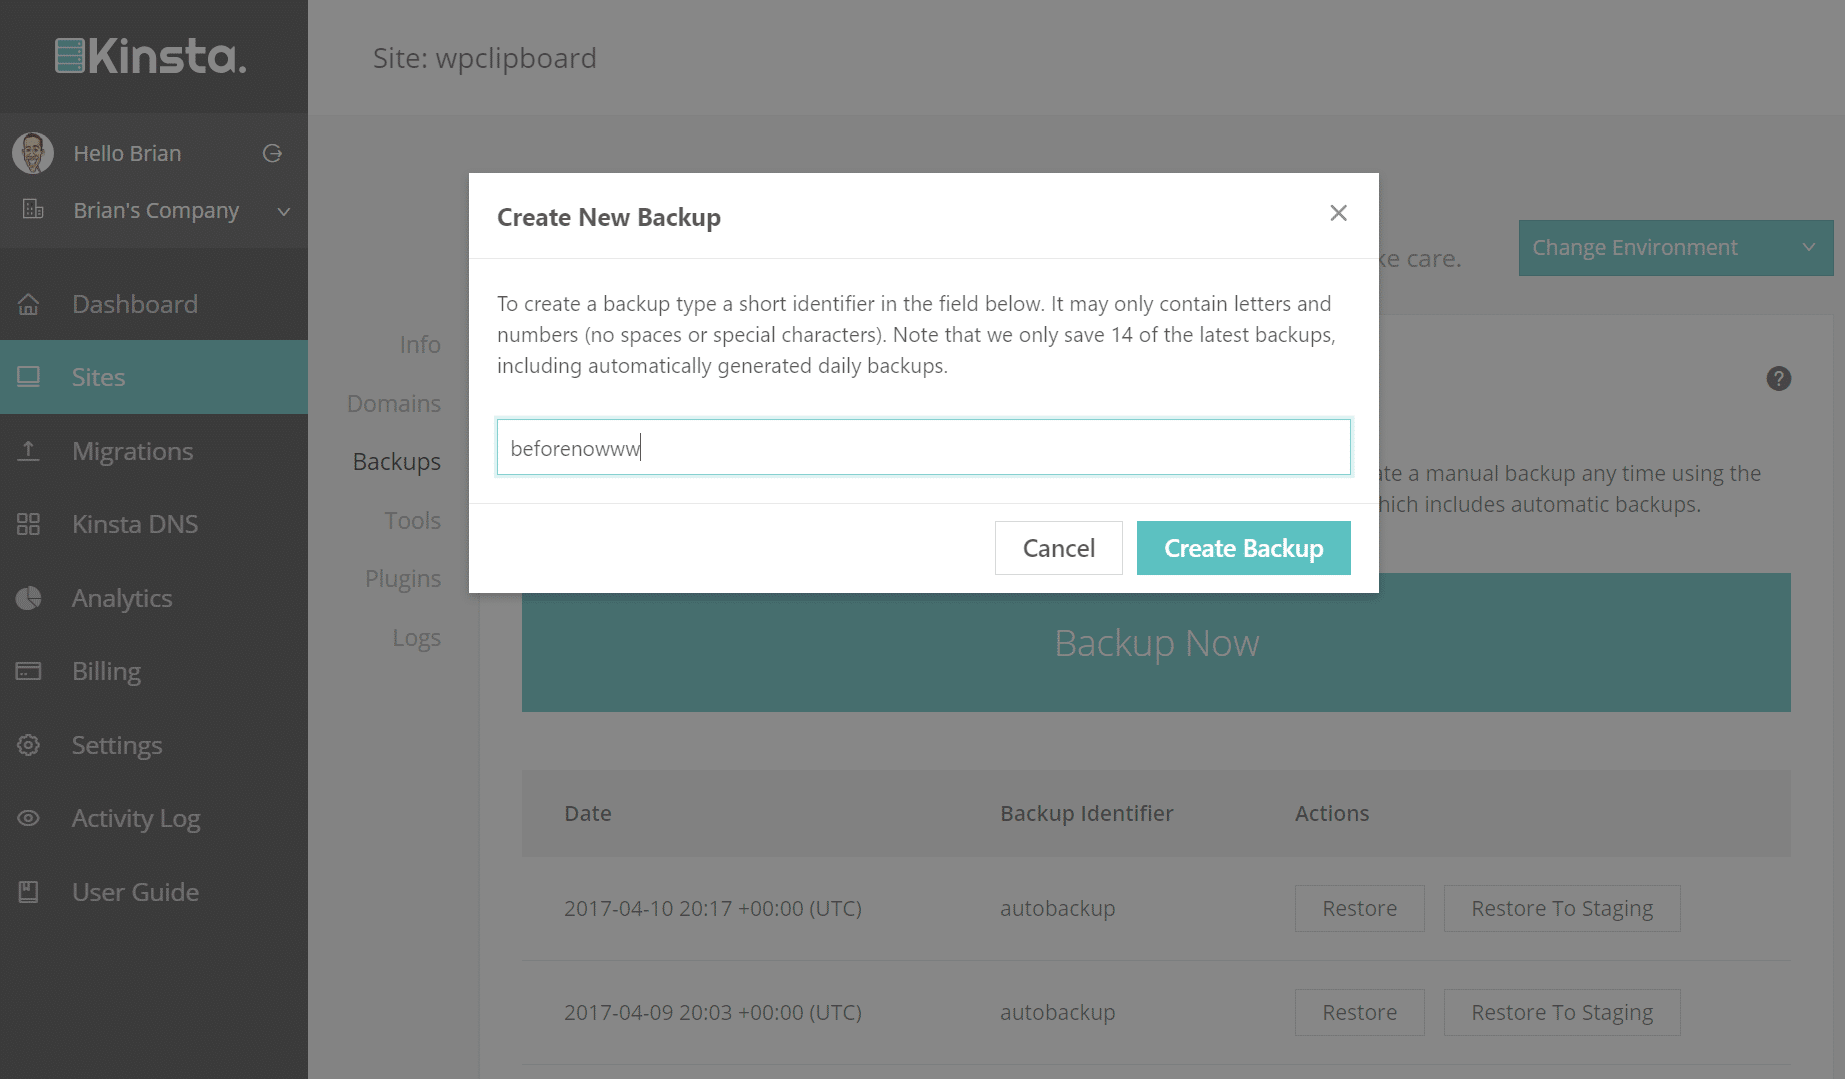
The very first thing you have to do is update all of the references to www in your database. I strongly urge you take a backup before doing anything remotely like this, as things can go wrong. I host with Kinsta, so in my case, I log into the MyKinsta dashboard, click into my site, and generate a new manual backup. This only takes a few seconds and I could rest easy knowing if I screwed up anything I could just instantly restore the backup.

Step 2
Then download the free interconnect/it search and replace script for WordPress. There are other WordPress plugins that do this (such as Better Search Replace), but I prefer this script and have used it for years. I trust these guys. Basically, all you do is upload it to the root of your WordPress site, browse to it, and insert what you want to search and replace. In this case, I wanted to replace “http://www.mydomain.com” with “http://mydomain.com” as shown below.

This actually converts the WordPress Address (URL) and the Site Address (URL) as well, so there is no need to change anything after the script is run. Make sure to press the “Delete” button when you are done, so the script removes itself.
Step 3
Then comes the most important part, and that is ensuring that you have 301 redirects in place. 301 redirects tell Google that the URL has moved to a new location. This will keep your SEO rankings in place. According to most SEO experts, 301 redirects will pass around 90-95% of the link juice. In migrations I have done, I haven’t seen any drops in SERPs.
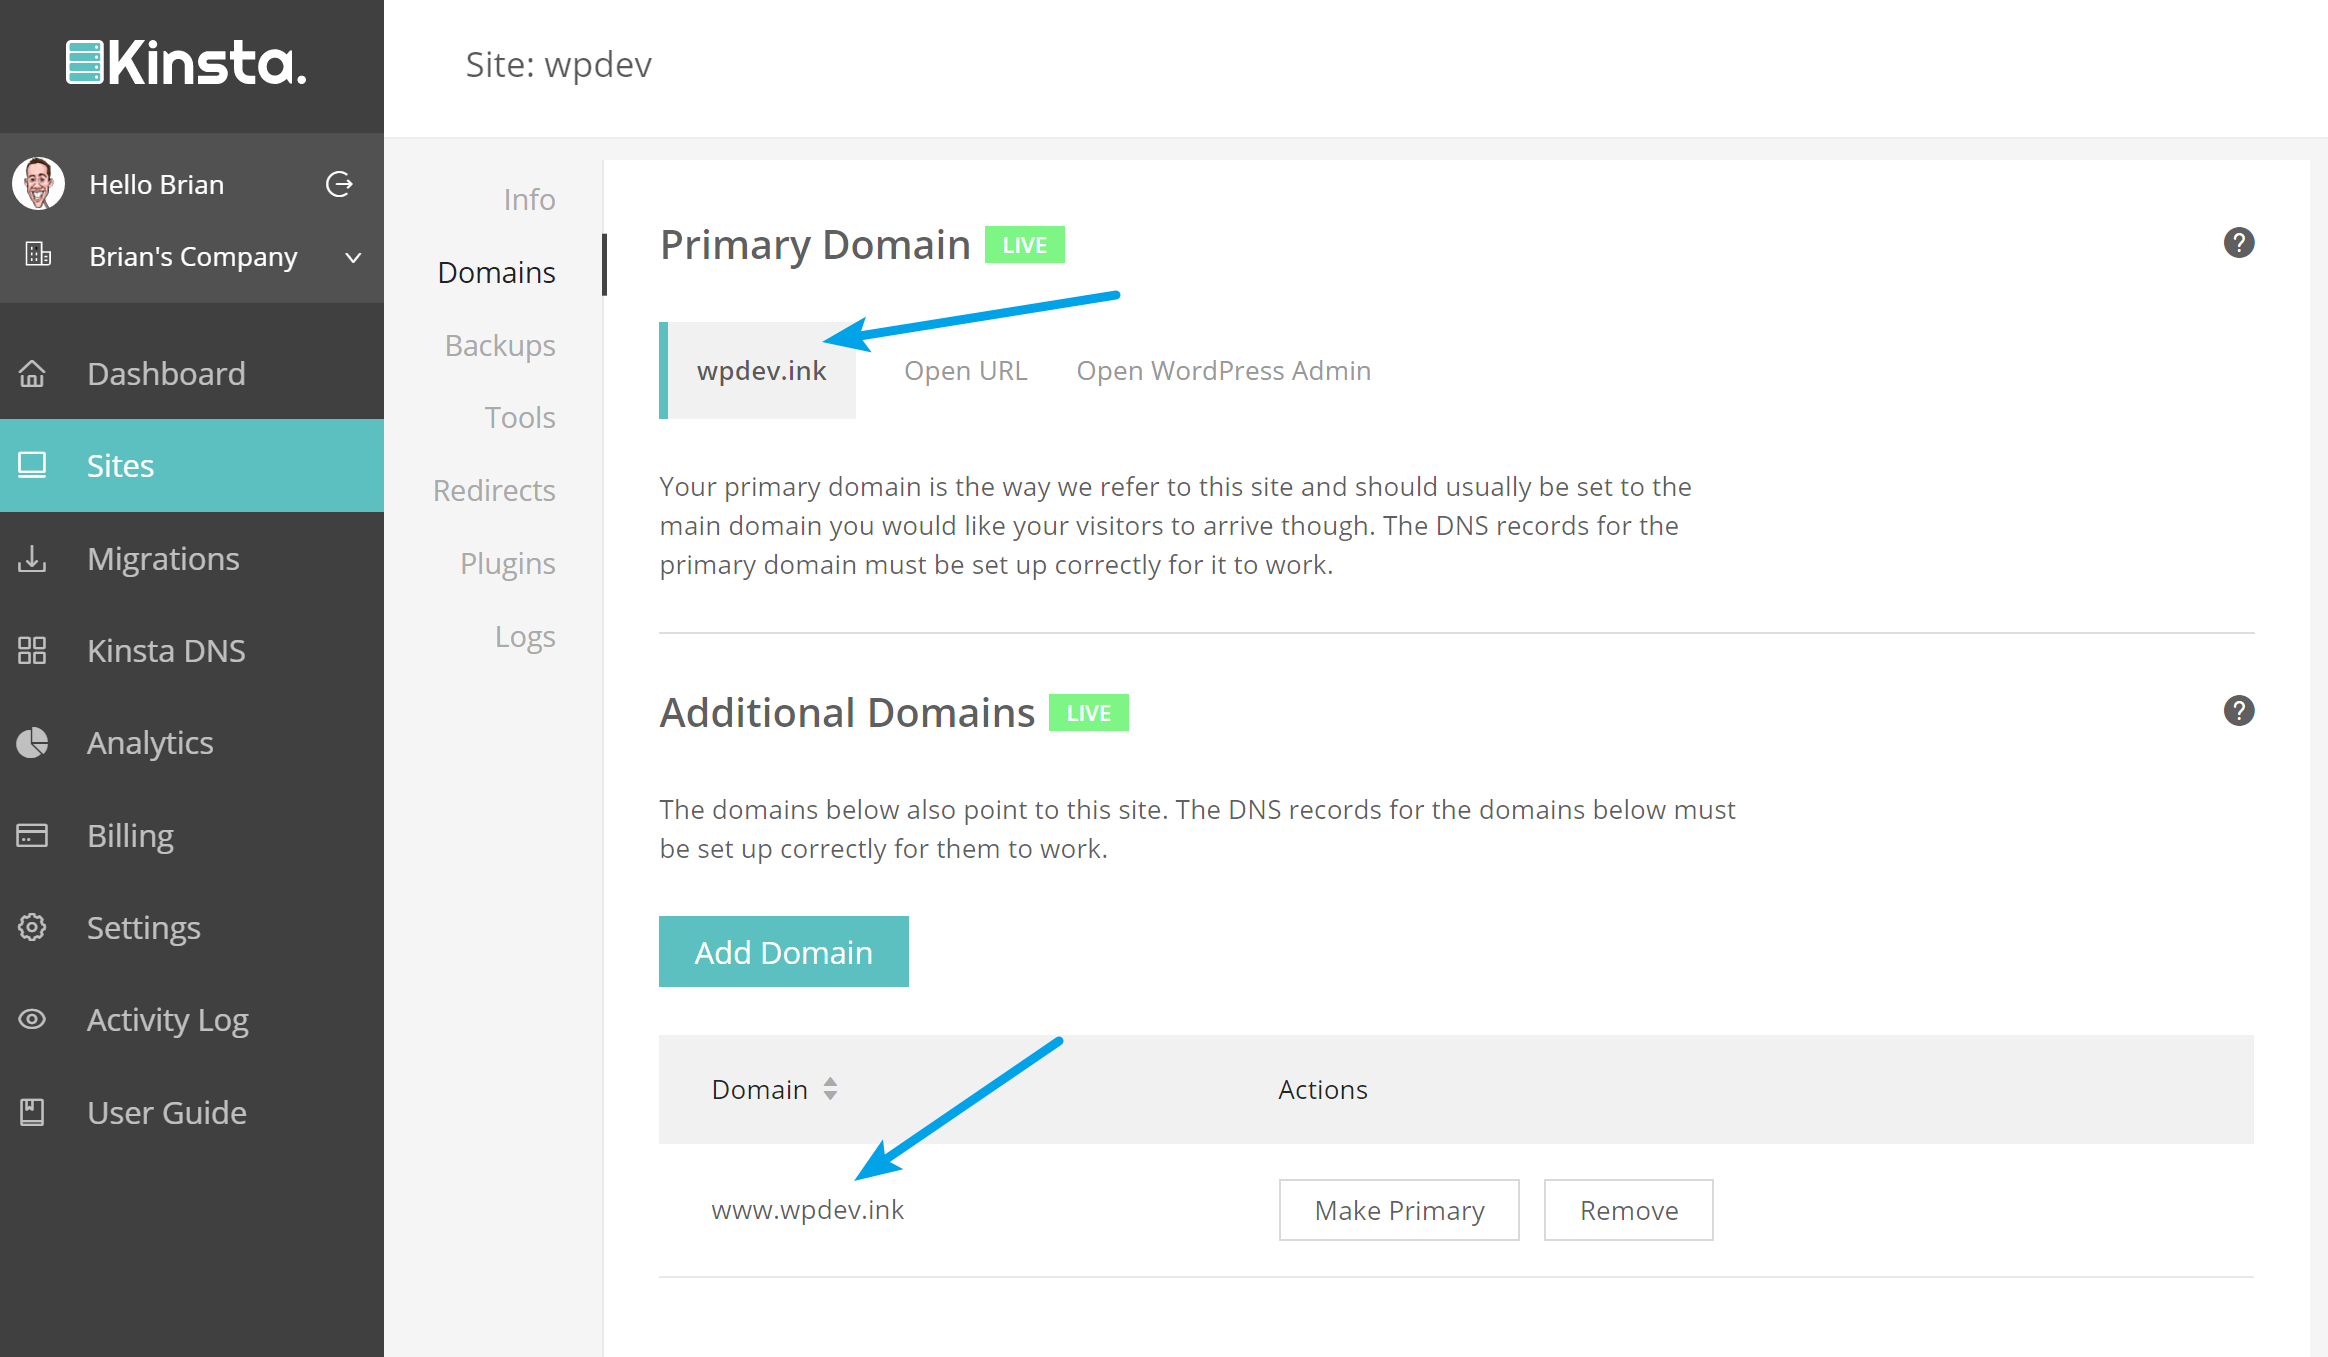
The easiest way to implement the 301 redirects globally is to ask your hosting provider. With Kinsta, I simply login to my account. Click into Domains and ensure that the primary domain is switched to the non-www version. The www version is then a secondary domain and the 301 redirects are automatically added behind the scenes.

If you are managing your own server, here is the way to globally add the 301 redirects from www to non-www manually.
Apache
If you are running on Apache, simply add the following code to your .htaccess file. In this example below, it is redirecting both the HTTP and HTTPS versions. As you should be running HTTPS. If you aren’t, check out these reasons why you should use HTTPs.
RewriteCond %{HTTPS} off
RewriteCond %{HTTP_HOST} ^www\.(.*)$ [NC]
RewriteRule ^(.*)$ http://%1/$1 [R=301,L]

RewriteCond %{HTTPS} on
RewriteCond %{HTTP_HOST} ^www\.(.*)$ [NC]
RewriteRule ^(.*)$ https://%1/$1 [R=301,L]
NGINX
If you are running on NGINX, simply add the following code to your config file.
server {
 server_name example.com;
 return 301 $scheme://www.example.com$request_uri;
}
If you are using HTTPS, you will need a second block with the listen directive set to port 443 instead of port 80.
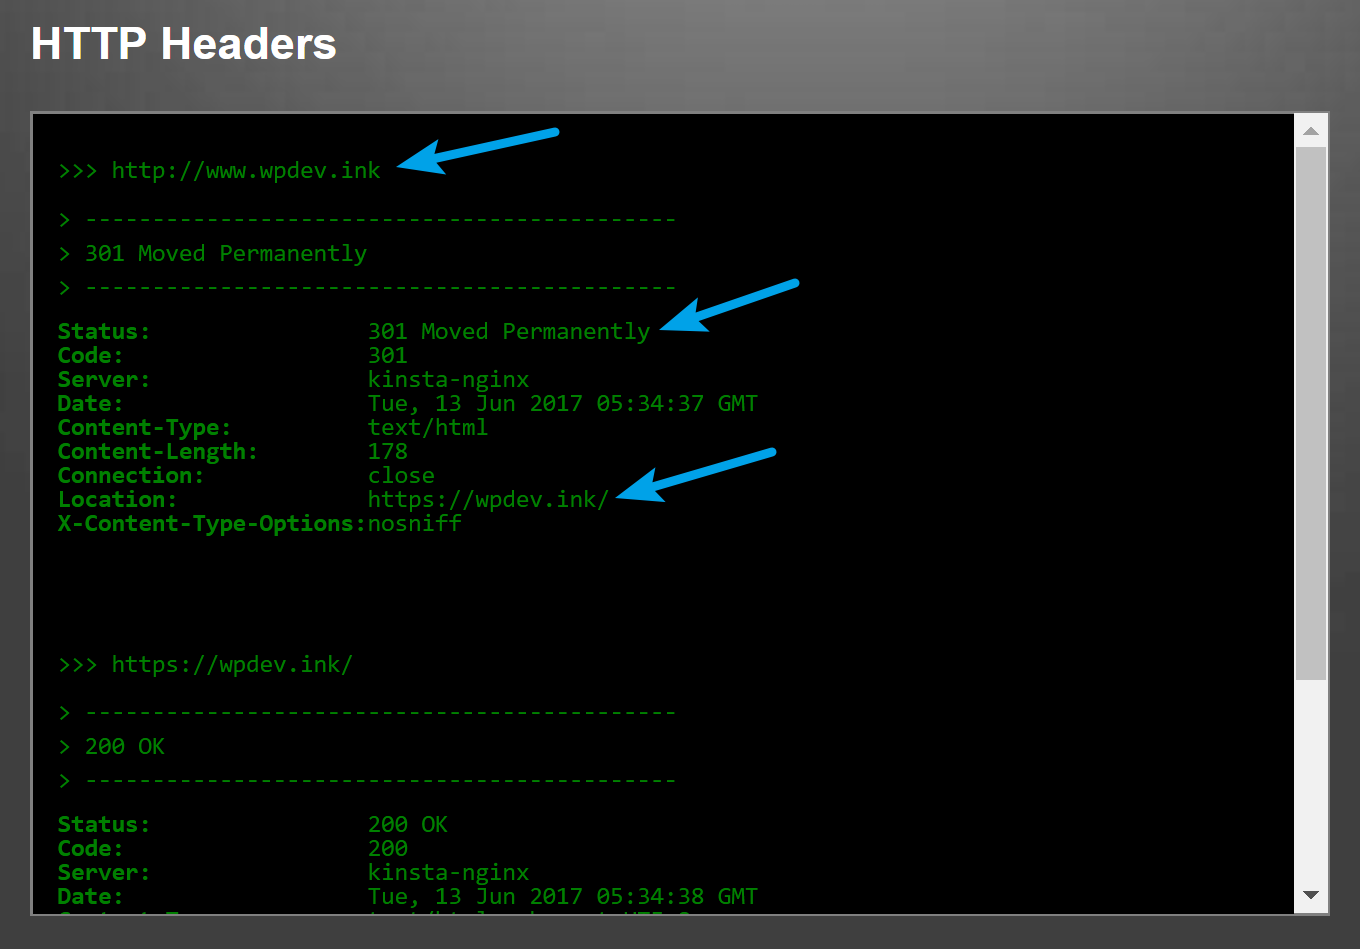
You can then easily check that the 301 redirects are working by throwing a couple URLs into the Redirect-Checker tool. In this example below you can see that my www version has a “301 moved permanently” status on it and the location is pointed to the HTTPS version.

Step 4
It is then recommended that you create a new Google Search Console profile and resubmit all of your sitemaps. You will want to monitor the indexing process in SERPs, as you will start to see the www versions drop out and get replaced with the non-www versions.
Summary
As you can see, there isn’t that much involved with a migration from www to non-www. However, you want to make sure and do everything correctly, as shown above, otherwise, you could definitely end up in a disaster. What are your thoughts? Have you experienced any issues when migrating from www to non-www? If so, let me know below!

It might be good to specify during the Search and Replace section that you should also include the domain name (http://www.example.com), otherwise you can potentially overwrite other links that are in your content (http://www.google.com then becomes http://google.com, for instance) and cause issues.
Oh definitely, thanks for pointing that out. Don’t want to confuse people. I have updated the reference above with more specific domain information. Thanks again!
Hi Brian,
I see this working nicely when you desire shorter URL’s. May get more shares that way. I dig my domain name but shaving 2 letters from bloggingfromparadise looks more appealing sometimes. Thanks much :)
Ryan