If you use WordPress on a daily basis, then you are probably familiar with commonly used post types such as posts and pages. However, there are times when you might want to break things down into separate categories or templates, and that is where custom post types come into play.

Custom post types help to extend and organize your site, and allow you to more easily scale your WordPress site. From press releases to case studies, or even a database of artists. Custom post types can be used for all sorts of different things.
One of the problems though is they aren’t always the easiest thing to set up. Typically developers are the ones that configure custom post types for a site. But that doesn’t have to be the case.
Below I’ll walk you through a couple of easy ways to set up a basic custom post type (CPT), as well as fixing the slug and enabling it to work in the WordPress block editor.
- Examples of custom post types and usage
- How to create a custom post type
- Remove base slug from custom post type URL
- Enable block editor support
- Display custom post type on a page
Examples of custom post types and usage
I thought it might help if you could see some examples of custom post types being used on live sites. So here are a couple.
Food and menus example
On our No Gluten site, we have different gluten-free foods lists as well as gluten-free restaurants and fast food places. Each of these has its own custom post type. You can click into “Menus” and add a new post, just like you would with a standard blog post.
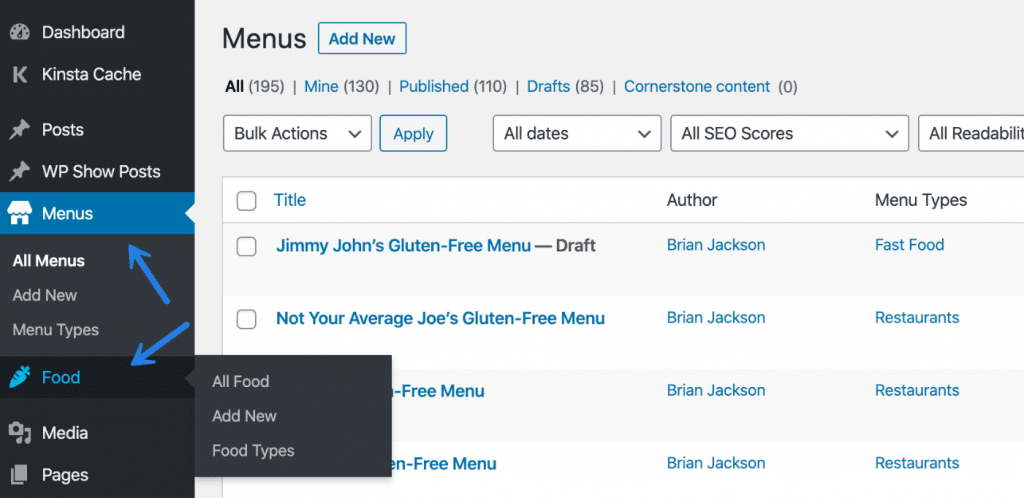
The difference is that these don’t appear on the blog. We already a blog section on our site. This allows us to completely customize a separate template for these types of posts. As you can see below, we have built a directory using the custom post types.
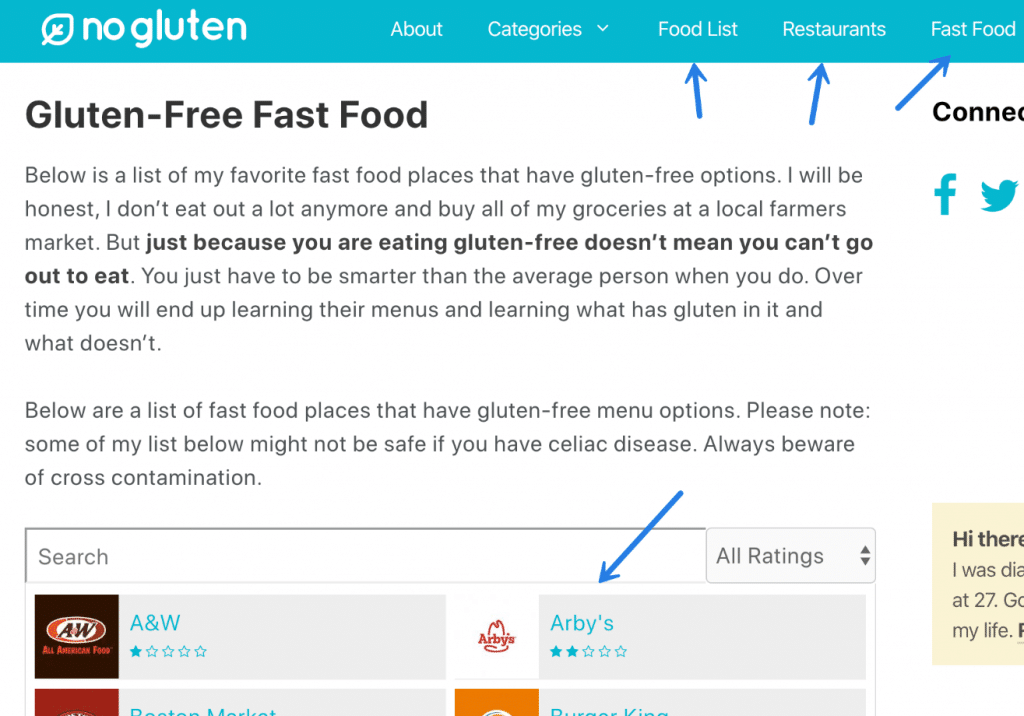
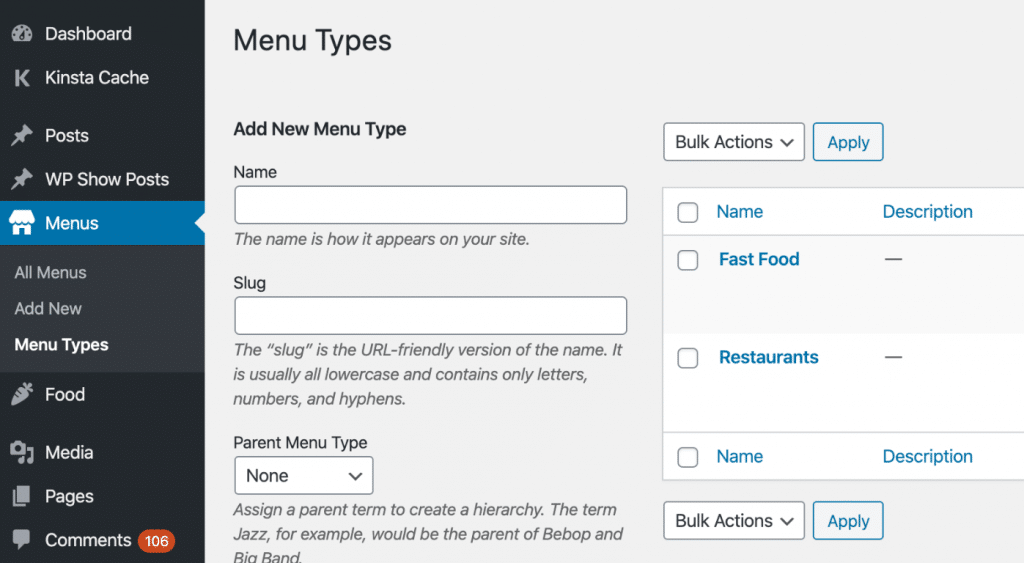
You can then build out different types within a custom post type. These are similar to how categories work with normal posts. So we have a menu type for fast food and one for restaurants.
Coupon example
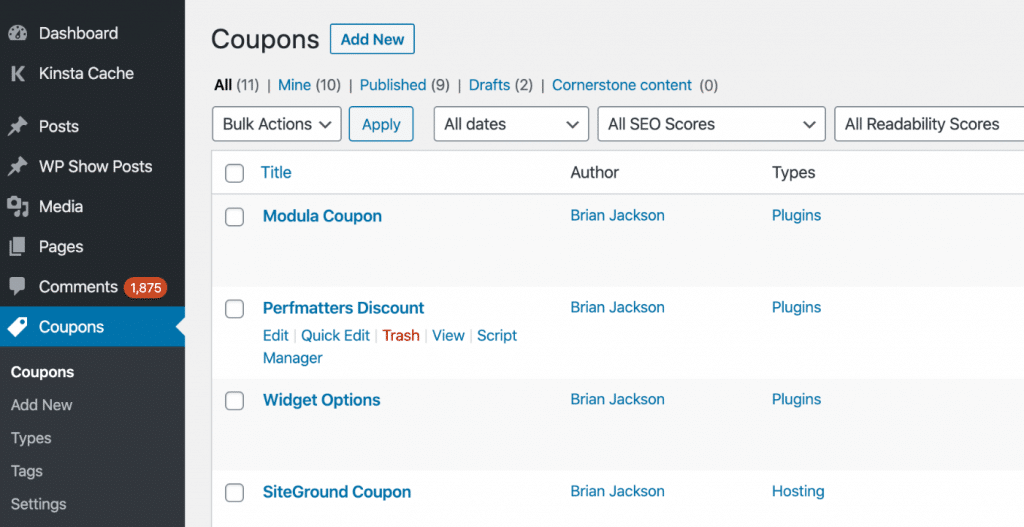
Another example is with our WP Coupons plugin that you seeing powering our deals page on this site. Each coupon is simply a post underneath the “Coupons” custom post type. In this case, the custom post type is created automatically when you install and activate the plugin.
Artist example
One last example is from a new project that I’m working on about synthwave music. In the project, I’m creating a database of synthwave artists. So for this, it made logical sense to create a new “artist” custom post type in WordPress.
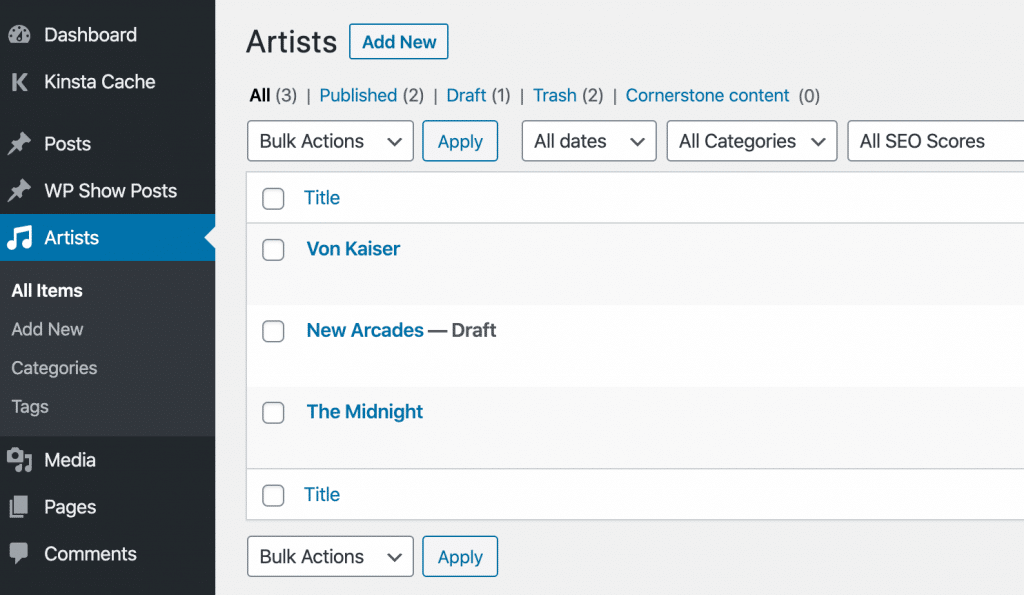
I then display the artists (CPT) automatically in alphabetical order on a page.

How to create a custom post type
The first way you could go about creating a custom post type would be to simply use a plugin on the repository. However, I’m not a fan of installing additional plugins if I don’t have to. Especially if all that is needed is a separate custom post type without much customization.
If you want to go down the plugin route, here are a few plugins that can help:
- MB Custom Post Types & Custom Taxonomies
- Custom Post Type UI
- Custom Post Types and Custom Fields creator
- Custom Post Type Permalinks
Note: If you use one of the plugins above, some of the following steps below, like removing the slug, might not work.
I’m actually going to walk you through to create a custom post type manually with code. But don’t worry, you don’t need to be a developer to do this.
Step 1
The first step is to generate the code needed for your custom post type. I always use the handy online Custom Post Type Generator from Meta Box.
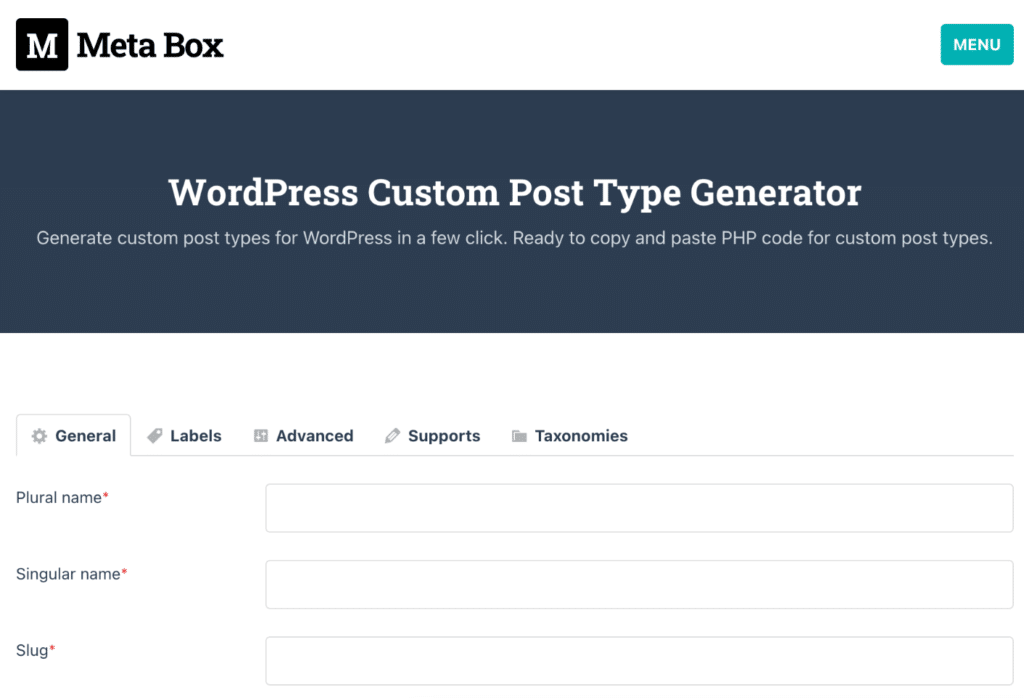
This allows you to easily change all the attributes and simply output the code in a few clicks. Here are a few attributes you will want to update:
- Plural name
- Singular name
- Name in admin bar (make sure to capitalize this)
- Show in menu? (choose show as top-level menu)
- Menu position after (choose Posts)
- Menu icon (Use one that is appropriate for your custom post type)
Here is the final code result. I’m using my “artist” custom post type as an example. So you will want to update this accordingly. I’ve also created a gist you can bookmark.
add_action( 'init', 'your_prefix_register_post_type' );
function your_prefix_register_post_type() {
	$args = [
		'label'  => esc_html__( 'artists', 'text-domain' ),
		'labels' => [
			'menu_name'          => esc_html__( 'artists', 'your-textdomain' ),
			'name_admin_bar'     => esc_html__( 'Artist', 'your-textdomain' ),
			'add_new'            => esc_html__( 'Add artist', 'your-textdomain' ),
			'add_new_item'       => esc_html__( 'Add new artist', 'your-textdomain' ),
			'new_item'           => esc_html__( 'New artist', 'your-textdomain' ),
			'edit_item'          => esc_html__( 'Edit artist', 'your-textdomain' ),
			'view_item'          => esc_html__( 'View artist', 'your-textdomain' ),
			'update_item'        => esc_html__( 'View artist', 'your-textdomain' ),
			'all_items'          => esc_html__( 'All artists', 'your-textdomain' ),
			'search_items'       => esc_html__( 'Search artists', 'your-textdomain' ),
			'parent_item_colon'  => esc_html__( 'Parent artist', 'your-textdomain' ),
			'not_found'          => esc_html__( 'No artists found', 'your-textdomain' ),
			'not_found_in_trash' => esc_html__( 'No artists found in Trash', 'your-textdomain' ),
			'name'               => esc_html__( 'artists', 'your-textdomain' ),
			'singular_name'      => esc_html__( 'artist', 'your-textdomain' ),
		],
		'public'              => true,
		'exclude_from_search' => false,
		'publicly_queryable'  => true,
		'show_ui'             => true,
		'show_in_nav_menus'   => true,
		'show_in_admin_bar'   => true,
		'show_in_rest'        => true,
		'capability_type'     => 'post',
		'hierarchical'        => false,
		'has_archive'         => true,
		'query_var'           => true,
		'can_export'          => true,
		'rewrite_no_front'    => false,
		'show_in_menu'        => true,
		'menu_position'       => 5,
		'menu_icon'           => 'dashicons-format-audio',
		'supports' => [
			'title',
			'editor',
			'thumbnail',
		],

		'rewrite' => true
	];

	register_post_type( 'artist', $args );
Step 2
Next, you need to add the code to your WordPress site. As in a lot of my other posts, I always recommend using the free Code Snippets plugin for this. Then you don’t have to worry about losing any custom code when you update WordPress or your theme.
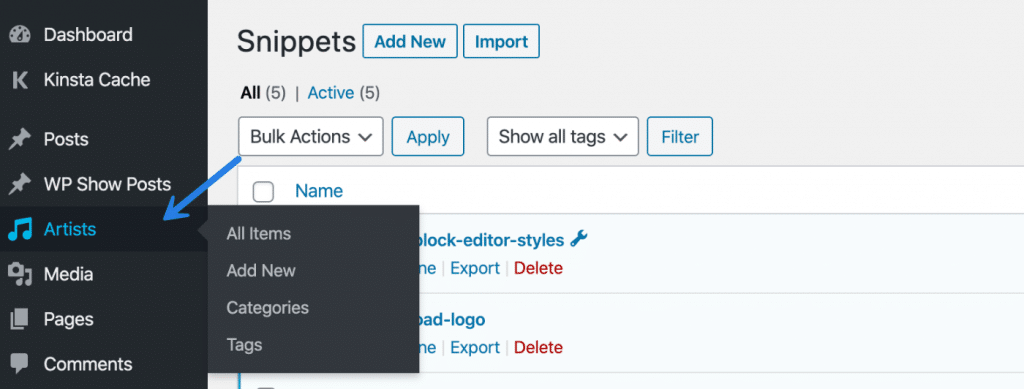
After adding the above code in a new snippet, you will then see your custom post type in the WordPress dashboard menu.
Enable block editor support
Most of you are now using the WordPress block editor. So you will want to make sure you enable support for it to work with your custom post type. This is already included in the snippet above, but I wanted to point this out. It is this line (gist):
'show_in_rest' => true,
Remove base slug from custom post type URL
Out of the box, custom post types look like this:
domain.com/url/url
If you are like me, you probably prefer to remove the base slug from the URL for SEO purposes. Google generally prefers simple and short URLs.
domain.com/url
To remove the base slug, you can add another code snippet with the following (gist). You will need to update accordingly with your CPT name.
function na_remove_slug( $post_link, $post, $leavename ) {

    if ( 'artist' != $post->post_type || 'publish' != $post->post_status ) {
        return $post_link;
    }

    $post_link = str_replace( '/' . $post->post_type . '/', '/', $post_link );

    return $post_link;
}
add_filter( 'post_type_link', 'na_remove_slug', 10, 3 );

function na_parse_request( $query ) {

    if ( ! $query->is_main_query() || 2 != count( $query->query ) || ! isset( $query->query['page'] ) ) {
        return;
    }

    if ( ! empty( $query->query['name'] ) ) {
        $query->set( 'post_type', array( 'post', 'artist', 'page' ) );
    }
}
add_action( 'pre_get_posts', 'na_parse_request' );
Note: While the above works fine, and I’m using it on some of my sites, know that it might cause functionality issues with other plugins that rely on the full URL being there. This is rare, but there are a few instances I’ve seen it cause problems.
Here is an alternative way to remove the rewrite base from custom post types. Props to Maciej for sharing this with me. Add a code snippet with the following (gist). You will need to update accordingly with your CPT name.
function bis_remove_cpt_slug($args, $post_type) {
if(in_array($post_type, array('artist'))) {
    $args['rewrite'] = array('slug' => '/');
}

return $args;
}
add_filter('register_post_type_args', 'bis_remove_cpt_slug', 10, 2);
Enable custom post type preview
Next, you will want to add support for the preview window in the editor to work with the custom post type. Add another code snippet with the following (gist).
//adds custom post type query var to preview links
function mycptname_cpt_previow_query_vars($link, $post) {
	$custom_post_types = array('artist');
	if(in_array($post->post_type, $custom_post_types)) {
		return add_query_arg(['post_type' => $post->post_type], $link);
	}
	return $link;
}
add_filter('preview_post_link', 'mycptname_cpt_previow_query_vars', 10, 2);
Note: You can combine the above functions, I’m just showing them separately as it’s easier to see how everything is pieced together.
How to display custom post type on a page
Last but not least, I’ll show you an easy way to display your custom post types. In some cases, you might want to create a separate template for the custom post type, but if you want something simple, the following works great.
Step 1
Download and install the free WP Show Posts plugin. This is developed by Tom Usborne, the developer of GeneratePress. So you can rest easy knowing it’s super lightweight. It’s actually quite powerful once you dive in and start using it.
Step 2
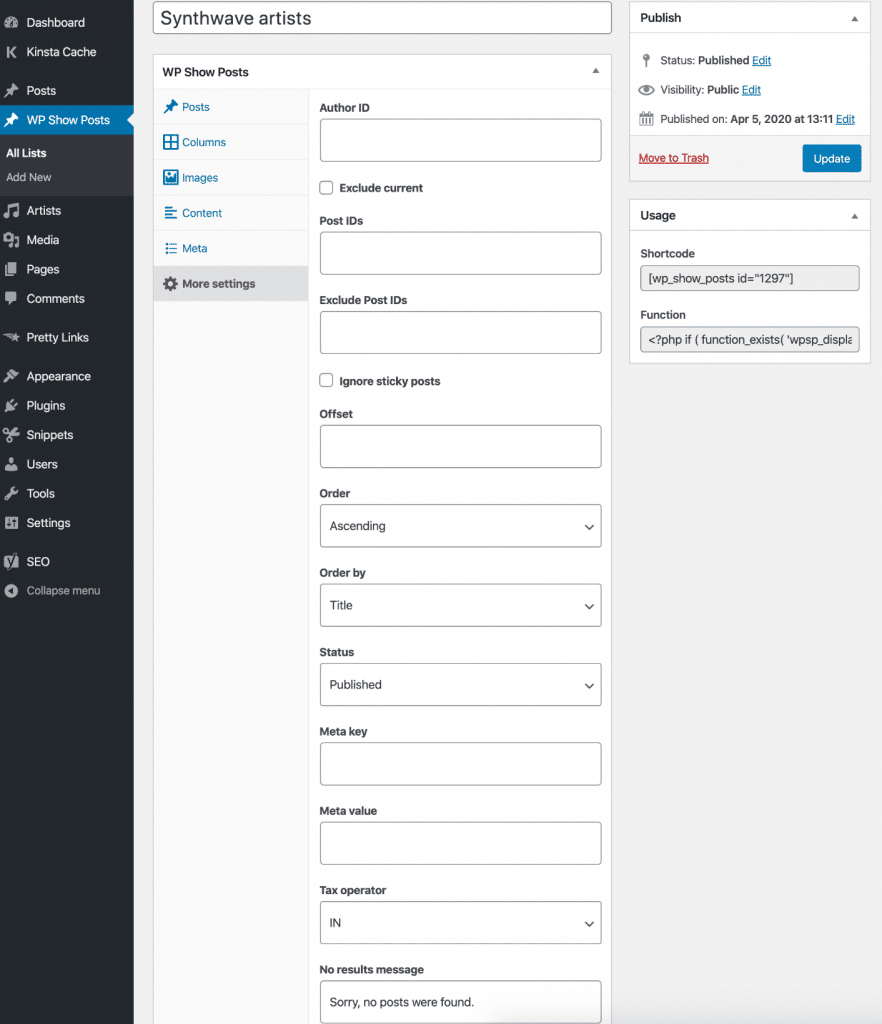
Next, create a new list and configure the settings. I’m using a simple list on my synthwave site in this example.
Posts
Under posts, make sure to change the post type to your new custom post type that you’ve created.
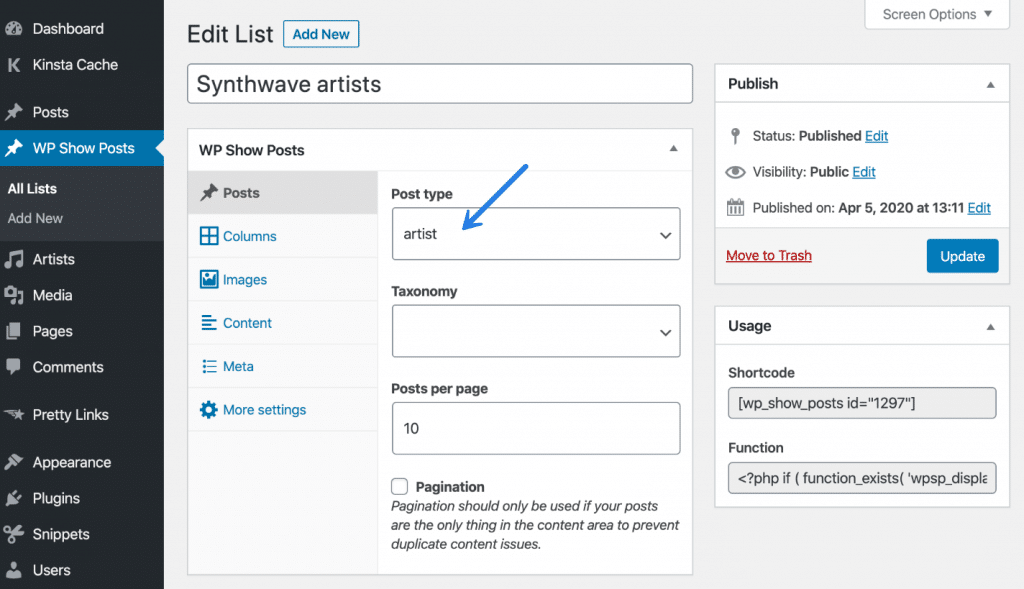
Below are the screens and settings for the rest.
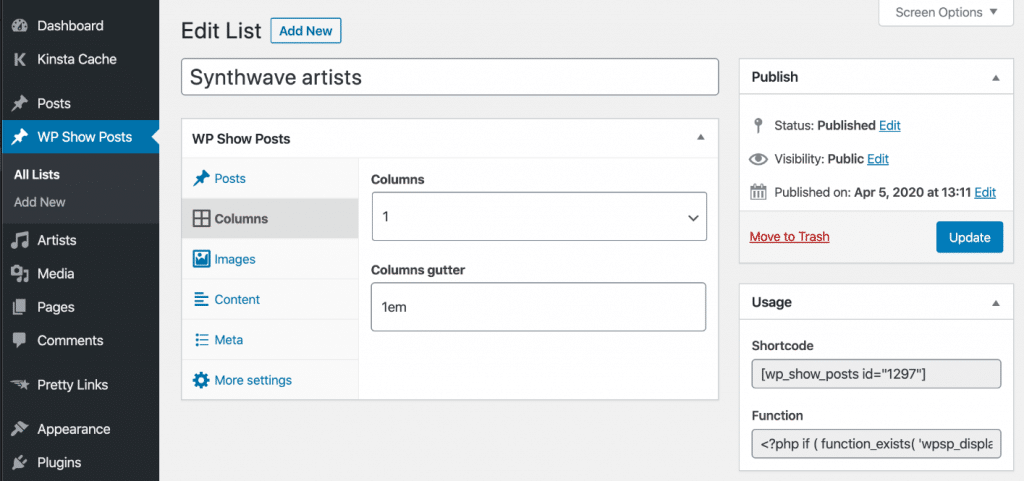
Columns
I’m using one column for now due to only having a few items. But if you have a lot of posts already, you could easily do a two, three, or four column layout which would fill out a page more.
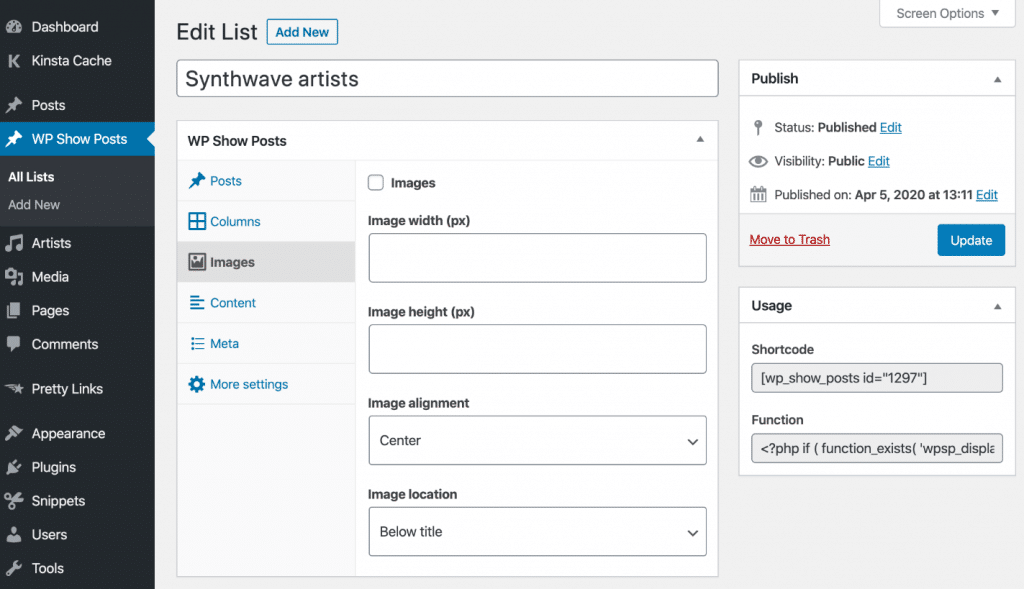
Images
I remove the images as I want a simple list.
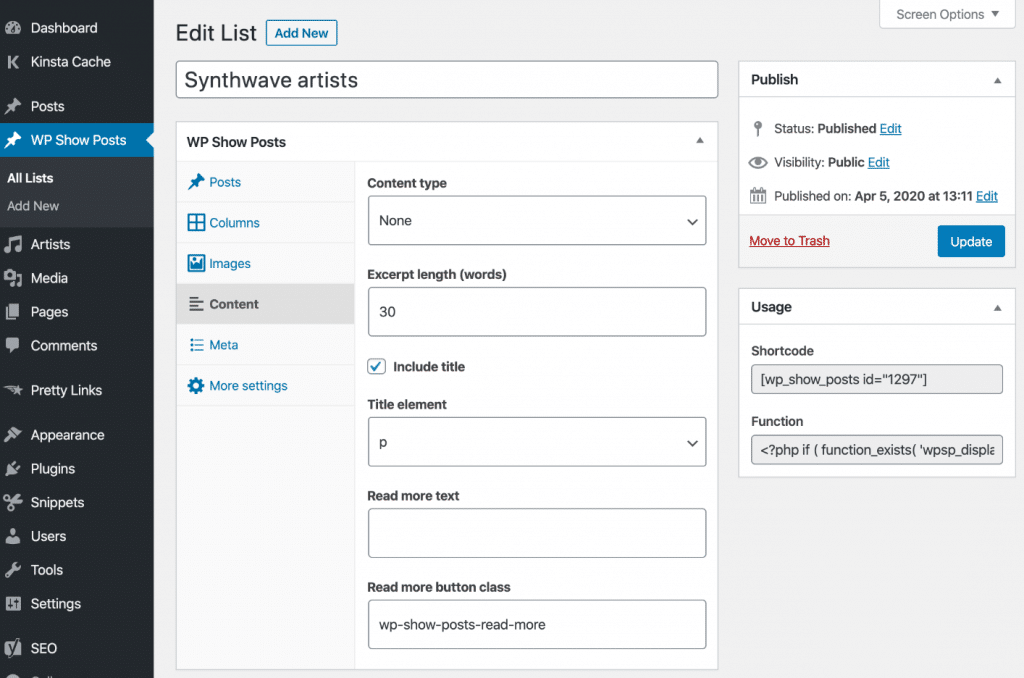
Content
I tweak the content to include the title.
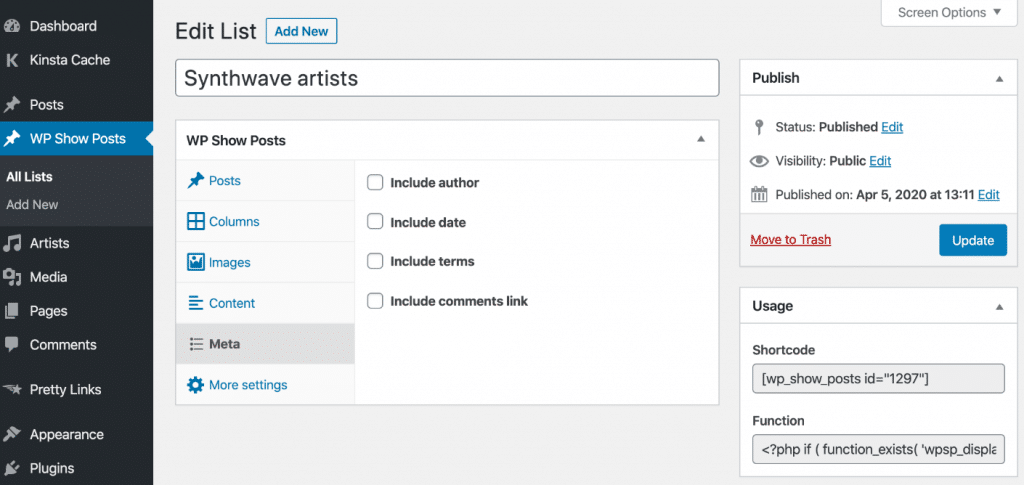
Meta
I remove all the meta data attributes.
More settings
You can sort the posts a lot of different ways. For mine, I wanted it to be alphabetical. So I changed the “Order” to ascending and the “Order by” to title.
Step 3
Then grab the shortcode from the sidebar of your list and enter it into the page where you want to list your custom post type.
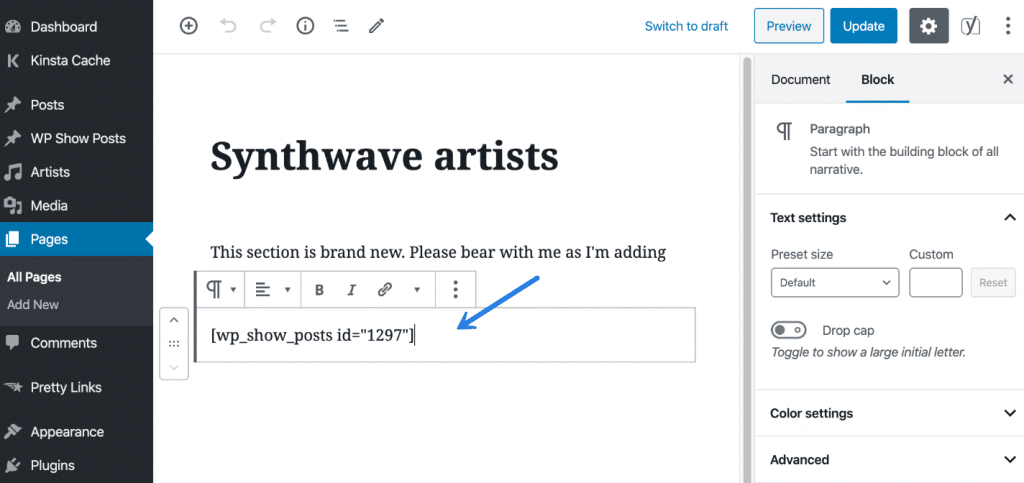
You will then have a sorted list your new custom post type. As you publish new posts they will automatically appear.

Summary
The tutorial above is just a simple example of how to create a custom post type and a way you could use it dynamically on your WordPress site. As you dive deeper you can start making custom post type templates and really utilize them to build out your site in an efficient and organized way.
If this tutorial was helpful please let me know below in the comments.
Thank You,Mr Brian!
I started with WordPress via Australians( WP MUDEV,) then followed Syed Balkhi ( I have my own opinion about him which I’ll keep to myself ) and I’ve been receiving a notification of every single tweet by You as a CMO at Kinsta on my Android and it’s still like that 😀.
You are definitely one of my best tutors about the depths of Wordpress.
That’s not a flattery but a gratitude!
Kind regards from Bulgaria!
Wow, thanks Dimiter. I appreciate the kind words. I’ll definitely keep publishing more content like this. So stay tuned!
Hi Brian,
Thanks for publishing this tutorial. I just paid someone $100 for doing this for me and they messed up everything.
I want to add category slug in the final URL. Is it possible? I would appreciate if you can include a vcode for that in this guide.
Thank you,
-Swadhin
Hey Swadhin,
Sorry to hear that.
So I haven’t tried it with a category, but I think something like this should work: https://wordpress.stackexchange.com/questions/94817/add-category-base-to-url-in-custom-post-type-taxonomy/94820#94820
I would try out on a dev site first.
Hi Swadhin,
How about my plugin Permalink Manager? :) You can download it for free:
https://wordpress.org/plugins/permalink-manager/
It should be quite easy for you to add category slug to the permalinks.
Best regards,
Maciej
Hey Maciej,
The purpose of the post was really to do it without a plugin, but your plugin looks great! Thanks for taking the time to comment.
Awesome post , you made it really easy to understand this pretty hard topic for beginners. You helped me a lot so I just wanna say thank you.
Excellent post. Nice work keep it up. Thanks for sharing the knowledge.
Thanks,
I was looking for something simple and clean looking like Wp Show Post, the best part is it was made by Tom. I’ll buy the pro version immediately for sure. I even purchased Essential Grid Plugin from Codecanyon in the past but still I am not satisfied enough with it.
I really thank you Brian for publishing a clear and easy tutorial like this one, straight and to the point. I’m heading to your Newsletter page directly and push that subscribe button. Seriously, this Blog is GOLD Nugget! Will be waiting your new post :D
Glad you liked it. Yes, WP Show Posts is an awesome plugin. I use it on a couple of my sites. Also agree that with Tom from GeneratePress being the developer, it makes it even better. :)
Hey Brian,
nice blogpost! Exactly what I was looking for.
the URL for my Post is correct now. The problem I have: I cant access to the archive, to see all posts of the CPT. The archive should be found under the normal /cpt-slug/. Is their a solution for that?
Thanks and best regards
I just updated the permalink settings page and now it works perfectly :) ! Amazing! Thank you.
Just your second short gist does not work for me. Both pages showing 404.