
A little over a year ago I did a review of InMotion Hosting. However, over this past year, a lot has happened as it pertains to web performance and speeding up WordPress in general. Now there are new protocols such as HTTP/2, free SSL from Let’s Encrypt, PHP 7, and a bunch of other things.

Unfortunately, InMotion Hosting has not been upgrading with these changes and I will no longer be recommending them to anyone. I am happy to say that I have done a full analysis of SiteGround hosting and was actually blown away.
Check out my in-depth SiteGround review below and even some optimization tips for getting the best speed out of their platform.
I was able to achieve speeds of under 300ms! Speed tests below.
SiteGround Review
For a cheap and affordable host, SiteGround is definitely at the top of the pack when it comes to keeping up with technology as it changes. They were one of the first web hosts to jump on the HTTP/2 bandwagon, thank you! For those of you who don’t know, HTTP/2 is a new protocol that requires SSL/TLS (HTTPS) and speeds things up with parallelism, multiplexing, smaller headers, and other things. This actually makes running HTTPS fast now.
And for those of you who care about SEO, I encourage who to migrate to HTTPS to take advantage of even the small ranking factor boost. Every single blog and website I run is over HTTPS. Thankfully this is now free with SiteGround’s Let’s Encrypt integration. InMotion Hosting still charges you $99 a year to set up SSL, which is ridiculous.
SiteGround Pricing & Features
They have plans starting at $9.95 $3.95 (with my 60% discount) a month and all of them include the following:
- Free SSDs
- HTTP/2 & PHP 7
- MariaDB
- Free Domain
- Free Backups (with super easy restoration form)
- Unlimited Disk Space
- Preinstalled WordPress upon Checkout
- Free Website Transfers (no-downtime)
- WP-CLI
- Select your Data Center Location
- 30-Day Money-Back Guarantee
- 24×7 Support
Support
SiteGround doesn’t just offer great speeds, they also have amazing support which is available 24 hours a day, 365 days a year. Always comforting to know someone is there to help if you run into a problem. I have chatted with them a couple of times now and they have always been very helpful.
Getting Started with SiteGround
Here is a quick walkthrough on getting started with SiteGround hosting. It is very easy.
Step 1
Simply signup for a plan, and upon checkout, you will be greeted with an easy to use website setup wizard. In this example, I am using a test domain and so I am going to do a fresh install of WordPress so I select “Get WordPress preinstalled on this account.” I also chose Chicago as my datacenter.

Note: SiteGround doesn’t take American Express. If you try to use one, you will get an error like “no available payment agent.”
Step 2
Then choose your login credentials for WordPress and click submit. If you don’t pick a theme from the options you get the default WordPress 2016 theme which is what I wanted.

You will see account information on the next page, such as your WordPress login. You also get an email with this.
Step 3
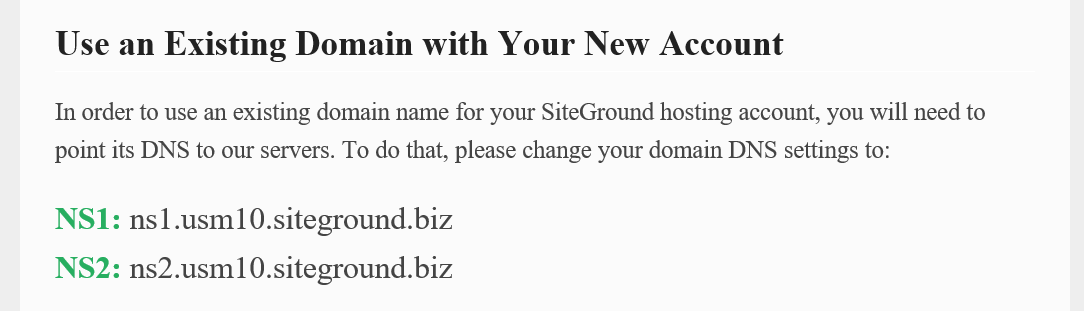
Next, you need to point your domain to SiteGround. You will get an email in your inbox with your nameservers.
You do this at your domain registrar. In my example, I am using Godaddy because this is where my test domain was registered. So I click into my domain and next to click on “Set Nameservers.”

Step 4
Then under “Custom” input the nameservers that SiteGround gives you in the email.

You might need to wait a few minutes after you hit save for everything to propagate. When I ran through it, it was almost instant. You can then test your domain to ensure WordPress is up and running. As you can see below a fresh install of WordPress was installed on my test domain, themewood.com.

Step 5
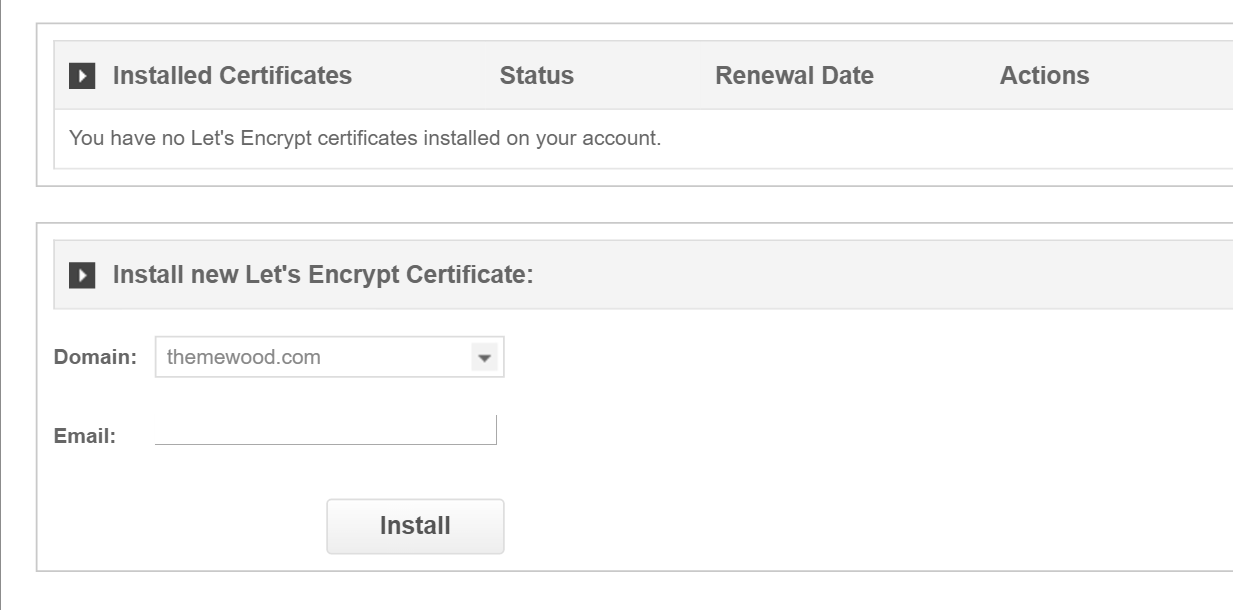
The next thing I recommend doing is enabling SSL. This is optional, but I highly recommend running over HTTPS. And it is completely free with SiteGround! To do this simply click into your SiteGround dashboard and click on the “Go to cPanel” button.

Step 6
Then scroll down and click on “Let’s Encrypt.”

Step 7
Click on the “Install” button. This will then take a few minutes and you will see a successful message afterward.
Step 8
Now you need to add a redirect to SSL so everyone is redirected from HTTP to HTTPS. There are plugins that do this, like the free Really Simple SSL plugin (if you use the plugin you can skip to step 12). I recommend doing it on the server though. To add the redirect we need to edit a file on your web server. So we need to create an FTP account. In Cpanel simply click into the FTP accounts icon.

Create a new FTP account. In my example I simply made one called “ftpaccount” and make sure to choose the root directory of /public_html/. Then click on “Create FTP Account.” Make sure to store the password somewhere you remember it.

Step 9
Now it is time to login via FTP. I recommend using a free FTP client like FileZilla. Use the information you created in the previous step.
Example:
FTP Username: ftpaccount@themewood.com
FTP Server: ftp.themewood.com
FTP: port: 21
Once you get in, you will see a file called .htaccess. Download this to your desktop so you can edit it.

Step 10
Add the following code into your .htaccess file and save it.
RewriteEngine On
RewriteCond %{SERVER_PORT} 80
RewriteRule ^(.*)$ https://yourdomain.com/$1 [R=301,L]
It will look like this below after you are done. Then re-upload it to your server.

Step 11
Now that the redirect is in place you need to login to your WordPress dashboard and change the WordPress Address and Site Address to HTTPS.

Step 12
The last thing to do is enable PHP 7. You will want this because it is faster. By default, SiteGround has PHP 5.4 enabled. In Cpanel again, click into the “PHP Version Manager.”

Click into your public_html directory and change it to PHP 7. For security purposes, the X-Powered-By header is removed to hide your PHP version.

And that is it! You now have WordPress up and running.
SiteGround Optimization – Optional But Recommended
Now to go through and optimize SiteGround to benefit from the most optimal speed. Again I am using a default WordPress install and chose the default WordPress twenty fifteen theme. I chose twenty fifteen simply because I don’t like the look of twenty sixteen.
Step 1
The first thing I do is disable the caching that SiteGround provides. Yes, this sounds strange, but there is a much faster method. To do this, in Cpanel, click into what they call “SuperCacher.”


Then turn off both the Level 1: Static Cache and the Level 2: Dynamic Cache.
Step 2
The reason we disabled that above is that we are going to use the free WordPress Cache Enabler plugin. This is a lightweight caching plugin that creates an HTML version of your page and caches straight to the disk. This method is still one of the fastest caching methods out there. You can read my article on Cache Enabler. There are plenty of debates which is faster, but my speed tests don’t lie.
Step 3
Because SiteGround is using a reverse proxy for Nginx we need to add a small snippet again to the .htaccess file to gain the full speed benefit of the Cache Enabler plugin and bypass PHP. Note: this is a very important step and can cut off about 300-400ms of your load time! Add the following to the very bottom of your .htaccess file.
# BEGIN Cache Enabler
<IfModule mod_rewrite.c>
RewriteEngine On
RewriteBase /

# set blog sub path
SetEnvIf Request_URI "^(.*)$" SUB_PATH=/wp-content/cache/cache-enabler/

# set Cache Enabler path
SetEnvIf Request_URI "^(.*)$" CE_PATH=$1
SetEnvIf Request_URI "^(/)index.php$" CE_PATH=$1

<IfModule mod_mime.c>
# webp HTML file
RewriteCond %{ENV:CE_PATH} /$
RewriteCond %{ENV:CE_PATH} !^/wp-admin/.*
RewriteCond %{REQUEST_METHOD} !=POST
RewriteCond %{QUERY_STRING} =""
RewriteCond %{HTTP_COOKIE} !(wp-postpass|wordpress_logged_in|comment_author)_
RewriteCond %{HTTP:Accept-Encoding} gzip
RewriteCond %{HTTP:Accept} image/webp
RewriteCond %{DOCUMENT_ROOT}%{ENV:SUB_PATH}%{HTTP_HOST}%{ENV:CE_PATH}index-webp.html.gz -f
RewriteRule ^(.*) %{ENV:SUB_PATH}%{HTTP_HOST}%{ENV:CE_PATH}index-webp.html.gz [L]

# gzip HTML file
RewriteCond %{ENV:CE_PATH} /$
RewriteCond %{ENV:CE_PATH} !^/wp-admin/.*
RewriteCond %{REQUEST_METHOD} !=POST
RewriteCond %{QUERY_STRING} =""
RewriteCond %{HTTP_COOKIE} !(wp-postpass|wordpress_logged_in|comment_author)_
RewriteCond %{HTTP:Accept-Encoding} gzip
RewriteCond %{DOCUMENT_ROOT}%{ENV:SUB_PATH}%{HTTP_HOST}%{ENV:CE_PATH}index.html.gz -f
RewriteRule ^(.*) %{ENV:SUB_PATH}%{HTTP_HOST}%{ENV:CE_PATH}index.html.gz [L]

AddType text/html .gz
AddEncoding gzip .gz
</IfModule>

# webp HTML file
RewriteCond %{ENV:CE_PATH} /$
RewriteCond %{ENV:CE_PATH} !^/wp-admin/.*
RewriteCond %{REQUEST_METHOD} !=POST
RewriteCond %{QUERY_STRING} =""
RewriteCond %{HTTP_COOKIE} !(wp-postpass|wordpress_logged_in|comment_author)_
RewriteCond %{HTTP:Accept} image/webp
RewriteCond %{DOCUMENT_ROOT}%{ENV:SUB_PATH}%{HTTP_HOST}%{ENV:CE_PATH}index-webp.html -f
RewriteRule ^(.*) %{ENV:SUB_PATH}%{HTTP_HOST}%{ENV:CE_PATH}index-webp.html [L]

# default HTML file
RewriteCond %{ENV:CE_PATH} /$
RewriteCond %{ENV:CE_PATH} !^/wp-admin/.*
RewriteCond %{REQUEST_METHOD} !=POST
RewriteCond %{QUERY_STRING} =""
RewriteCond %{HTTP_COOKIE} !(wp-postpass|wordpress_logged_in|comment_author)_
RewriteCond %{DOCUMENT_ROOT}%{ENV:SUB_PATH}%{HTTP_HOST}%{ENV:CE_PATH}index.html -f
RewriteRule ^(.*) %{ENV:SUB_PATH}%{HTTP_HOST}%{ENV:CE_PATH}index.html [L]

# wp override
RewriteCond %{REQUEST_FILENAME} !-f
RewriteCond %{REQUEST_FILENAME} !-d
RewriteRule . /index.php [END]
</IfModule>
# END Cache Enabler
Step 4
I then install our Perfmatters performance plugin. This helps to get rid of useless things in WordPress like smiley emojis, embeds, etc. All they do is add to your load time.
Step 5
I then do a couple of additional optimizations:
- I set up a CDN, KeyCDN, so that all of my assets will load fast around the globe. Read my tutorial on how to set up a CDN.
- I load my favicon on my CDN. (see tutorial)
- I load my Google fonts from my CDN. (see tutorial)
- I install ShortPixel so that I can convert the dummy data images below to WebP and compress them.
SiteGround Review Speed Tests
And finally, here are the speed tests below with both the default WordPress twenty fifteen theme and the Schema theme from MyThemeShop.
Twenty Fifteen Theme
As you can see I was able to load a fresh install with a 100/100 score on Pingdom with a load time of 280ms. And this is on shared WordPress hosting? That is right!

I also ran it through GTMetrix and you can see I scored a 95% PageSpeed score and a 99% YSlow score.

Schema Theme from MyThemeShop
I then uploaded the Schema Theme from MyThemeShop and imported the dummy data. As you can see I was able to load a fresh install with a 100/100 score on Pingdom with a load time of 294ms.

I also ran it through GTMetrix and you can see I scored a 97% PageSpeed score and a 99% YSlow score. This was actually better than the default WordPress theme.

Obviously some of these times will go up slightly once you add more content, but I was more concerned with the bare bones and how fast I could get their shared servers to benchmark. Under 300ms is very impressive. It just goes to show the power of Nginx, PHP7, HTTP/2, a CDN, and superior caching all working together in harmony.
Also it is important to note that I am offloading every single script to my CDN. As you can see below in my waterfall, everything except for the initial DOC load, of course, is loading from my CDN. So when you combine SiteGround + KeyCDN, you pretty much get a winning combination. And both support HTTP/2 and free SSL with Let’s Encrypt.

Summary
All in all, SiteGround is just blazing when it comes to cheap and affordable WordPress hosting. I was very impressed, and trust me, that is hard to do. If you are looking for new affordable WordPress hosting, or maybe thinking of switching, I definitely recommend checking them out! If you use the link below you will get at least 60% off.
Grab 60% Off SiteGround Hosting
Was this Siteground review and tutorial helpful? If so, please let me below. Would love to hear your experiences with SiteGround. Also, don’t forget to check out additional WordPress optimization steps in my speed up WordPress guide.
Hi Brian, very nice review!
Yeah, I know well SiteGround, I used it for 1 years ago. It’s a Hosting very good for WordPress, with an amazing support, good prices and nice features, like SuperCacher, PHP 7, Nginx caching and MariaDB. On SiteGround you can use the configuration you want, like your example (with Cache Enabler + KeyCDN + HTTP2 and CDN, or also SuperCacher + Memcached + Autoptimize + CDN). On their Cloud Hosting plans, is available also HHVM.
Thanks Alessandro,
Ya I was actually very impressed myself, which is hard to do. For cheap hosting, they really do a great job and offer the latest technology. It’s refreshing to see and always great to have different options.
This is super helpful, Brian.
How do you determine if your host can benefit from the reverse proxy for Nginx step?
Hey, thank’s brian Great review.inmotionhosting have an HTTP2 feature?
InMotion doesn’t support HTTP/2 yet or Let’s Encrypt, that is why for cheap hosting I am now recommending SiteGround, as they offer both of these.
One thing to keep in mind is that cache enabler is currently incompatible for non-responsive themes when it comes to mobile devices. For instance, Jetpack’s mobile theme and WP-Touch will not will not be cached. I haven’t figured out a workaround as of yet but it might resolve itself once the CDN is enabled. Truthfully, we should all be upgrading to the latest standard of HTML and PHP.
If I may pick your brain:
1. Are you still keeping memcached enabled? I’d assume since you sound like me that you tinkered with both of them on.
2. Are you still keeping the WP SG plugin installed?
3. Are you using custom .htaccess rules for expires and other compression?/Gzip?
4. I’ve heard it’s not ideal to add the Step 3 code above to underneath the end wordpress although it seems to be a smarter approach.
5. Will that code (Step 3) apply to reverse proxies such as Cloudflare?
6. Also, are you using CDN minifiers and/or concatenation plugins?
Thanks!
Hey. Great comment.
I am not a big fan of Jetpack due to some bloat if you aren’t careful. That being said, I personally prefer responsive sites vs using a plugin. So Cache Enabler not being compatible with that was never an issue for me.
1. Memcached was disabled.
2. WP SG plugin was disabled.
3. Most of the expires headers and compression such as Gzip is all added automatically with CDN (KeyCDN).
4. I prefer just using a good CDN which adds the headers for you.
5. Probably answered that already :)
6. You can minify HTML with Cache Enabler, but other than that no. With HTTP/2 concatenation actually harms performance. That is a HTTP/1.1 optimization which you should no longer do if you have HTTPS along with HTTP/2.
Thank you for this. So helpful.
Just noticed the new logo. It looks great😀.
Thanks!
Hi Brian, I’m using A2 hosting but feel my site is running too slow (has a few issues to fix but still a lot slower than it should be). I notice you recommend both hosts on this site but if you had to pick one which would you go with? I’m mostly concerned with site speed.
Hey Rob! The A2 hosting article is rather old. I have put SiteGround through a lot of tests and if you are looking for a cheap host with fast speeds, SiteGround is the way to go. That is why I have them on my Toolbox page: https://woorkup.com/toolbox/
Great review, Brian.
The free optimization plugins you mentioned were very helpful for me.
I appreciate you taking the time to conduct the speed tests. I found it really helpful.
Previously I was interested in trying out the GrowBig package. But the limit of 25,000 hits a month they impose was a big no-no for me.
I finally went for DigitalOcean. At $5 a month, I’m handling sites with over 2,000 visits a day. But the drawback is that DO is unmanaged.
SiteGround is good for hosting some affiliate sites, with less traffic at SSD speeds.
Cheers.
I’m loving your blog.u really have an great analytical mind..nice info..every post so far loaded with great info and I have a nice flow too.thx dude
300ms ? really ? when I checked your site on pingdom tools it loads 1.16 s
so 300ms is not true
I get 469 ms right now 😀 https://tools.pingdom.com/#!/brvwpB/https://woorkup.com You need to test a couple times to ensure it’s serving up assets from CDN cache with the speed test tool. Depending on the location it might not be cached yet. Typical users will get assets from cache.
Brian, thanks for the recommendations and review. I just have one question, I have seen that some of the pictures are outdated related to the current interface, which there’s no problem but also would like to know: the performance recommendations are still updated?
Thanks for your help
Camilo
Hey Camilo,
Yes, I need to update the post. But yes, if you can’t afford a host like Kinsta, then SiteGround, in my opinion, is the next best choice. They are really good about staying on top of the latest technology. I work with clients on SiteGround on a regular basis. You won’t find a better host in their price range. Hope that helps!